Access Tokens
Access Tokens let you grant limited, scoped API access to other tools, scripts, or team members — without sharing your master authentication token. Each token is tied to specific virtual machines and one of two permission levels, with an optional expiry date.
Open the window from Tools → Access Tokens.
Overview
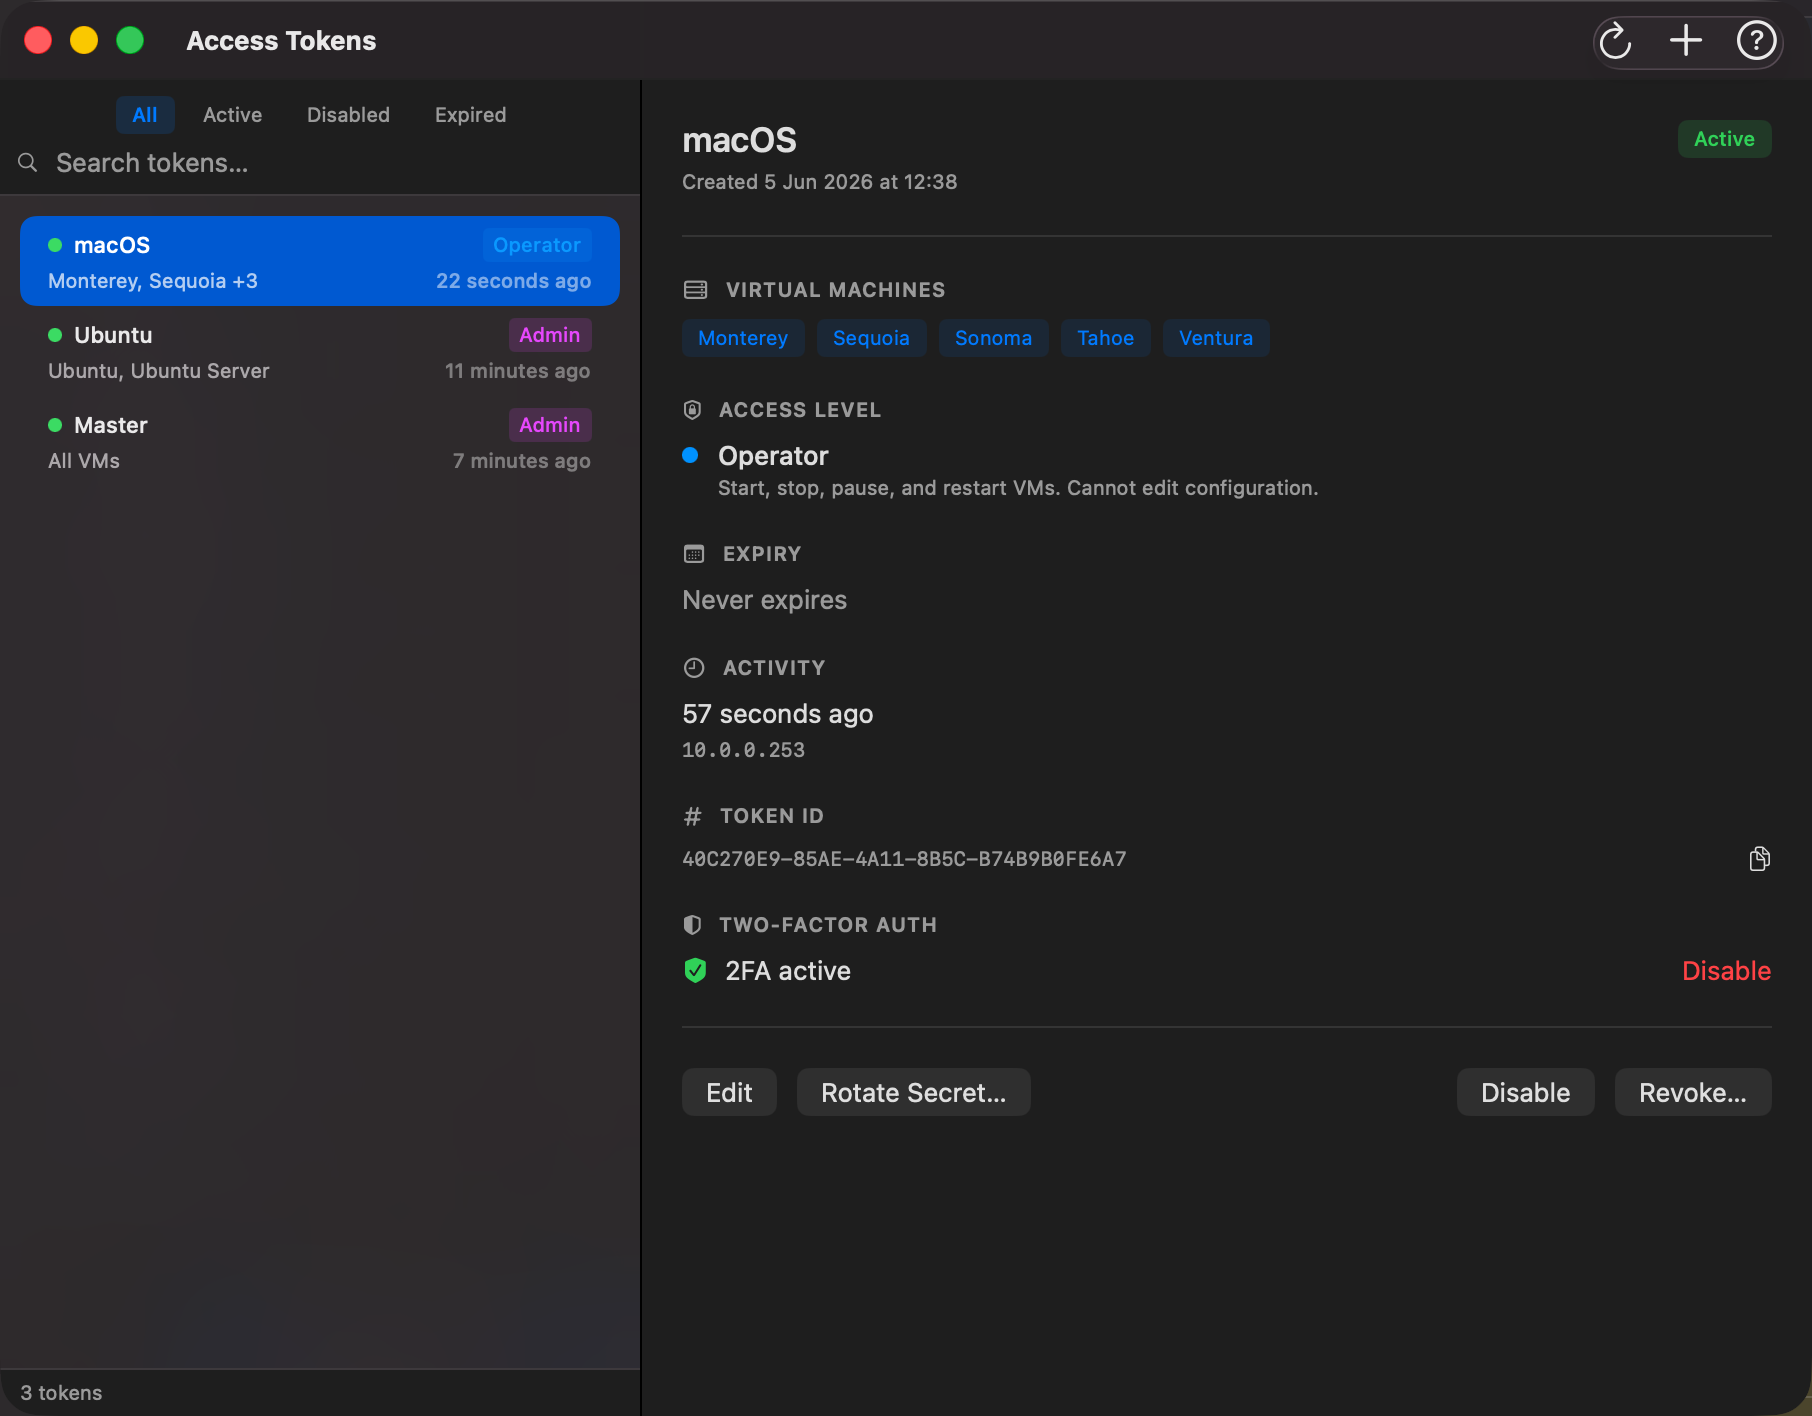
The window is split into two panels:
- Left sidebar — a list of all tokens, with status indicator, label, VM scope, and scope badge. Filter pills and a search bar let you find tokens quickly.
- Right panel — full details for the selected token, including all settings, last activity, and action buttons.
Access Levels
Every token has an access level (scope) that controls what API operations it can perform:
| Scope | What it can do |
|---|---|
| Operator | Start, stop, pause, resume, restart, and suspend VMs. Read VM info, status, and snapshots. Cannot edit configuration. |
| Admin | Full access — everything Operator can do, plus editing VM configuration, disks, networks, and snapshots. Admin tokens scoped to All VMs can also create new VMs (Quick VM and New VM), and can optionally be granted extended access to Templates, Networks, and Images. |
Tip: Use Operator tokens for monitoring tools, CI pipelines, and automation that only needs to control VM lifecycle. Reserve Admin tokens for tools that need to reconfigure VMs.
Extended Permissions
When creating or editing an Admin token scoped to All VMs, an Extended Permissions section appears with three optional checkboxes:
| Permission | What it grants |
|---|---|
| Templates | Browse, deploy, and manage VM templates |
| Networks | Create, edit, and delete host virtual networks |
| Images | Download and manage OS images in the image catalog |
Each defaults to unchecked. Only enable the permissions the token actually needs. If the token's scope is changed away from Admin or its VM scope is restricted to specific VMs, all extended permissions are automatically cleared.
Token Status
Each token in the list shows a coloured dot indicating its current state:
| Status | Dot colour | Meaning |
|---|---|---|
| Active | 🟢 Green | Token is valid and will be accepted |
| Disabled | ⚪ Grey | Token exists but is temporarily suspended — rejected until re-enabled |
| Expired | 🔴 Red | Token has passed its expiry date and is no longer accepted |
Creating a Token
Click the + New Token button in the toolbar to open the Create Token sheet.
| Field | Description |
|---|---|
| Label | A human-readable name to identify this token (e.g. CI Pipeline or Dev Laptop) |
| Virtual Machines | Select All VMs to allow access to every VM, or check individual VMs to restrict the token's scope |
| Access Level | Choose Operator (lifecycle control only) or Admin (full access) |
| Expiry | Toggle Never expires off to set a specific date — the token will automatically become invalid after that date |
Click Create Token to generate the token. A Token Reveal sheet appears immediately showing the secret — this is the value used as the X-Auth-Token header in API requests and CLI calls.
Important: The secret is shown only once and cannot be retrieved later. Copy it before closing the sheet. The Token ID (a separate value) can be viewed at any time for management purposes.
Viewing Token Details
Select any token in the sidebar to see its full details in the right panel:
- Label and creation date — shown in the header with the current status badge
- Virtual Machines — the VMs this token can access; shows All VMs with a star if unrestricted. An orange warning triangle appears if one or more VMs in the token's list no longer exist (e.g. they were deleted after the token was created).
- Access Level — the scope with a description of what it allows
- Expiry — expiry date and days remaining, or Never expires
- Activity — when the token was last used and from which IP address, or Never used
- Token ID — the management identifier (safe to share); click the copy button to put it in the clipboard
Editing a Token
With a token selected, click Edit in the right panel action bar. The panel switches to edit mode where you can update:
- Label — rename the token
- Virtual Machines — change which VMs the token can access
- Access Level — switch between Operator and Admin
- Expiry — add, change, or remove the expiry date
Click Save Changes to apply. Changes take effect immediately for the next request using that token.
Rotating a Token Secret
Rotate Secret… regenerates the bearer secret without affecting any other token settings (label, scope, VM list, or expiry). Use this when a secret may have been exposed but you don't want to recreate the whole token.
Click Rotate Secret… in the right panel, then confirm in the confirmation dialog. A new secret is displayed in the same one-time reveal sheet used when the token was created — copy it before dismissing. The old secret is invalidated immediately.
Disabling and Enabling a Token
Disable temporarily blocks a token without deleting it. Any request that presents a disabled token will be rejected. Use this to pause access without losing the token's configuration.
Enable restores a disabled token to active status.
Both actions take effect immediately.
Two-Factor Authentication (2FA)
Each scoped token can optionally require a 6-digit code from an authenticator app when logging into the web dashboard. The Two-Factor Auth row in the token detail panel shows whether 2FA is active or not set up.
Enrolling 2FA
2FA is set up from the web dashboard while signed in with the scoped token. See Web Dashboard Settings for instructions.
Disabling 2FA
Select the token, then click Disable in the Two-Factor Auth row and confirm. Any open web dashboard sessions for that token are signed out immediately.
2FA applies to web dashboard login only — the
vpvmCLI is unaffected.
Revoking a Token
Revoke permanently deletes a token. Any client using it will lose access immediately. This action cannot be undone.
Click Revoke… in the right panel, then confirm in the confirmation dialog. Once revoked, the token is removed from the list.
If you need to reinstate access after a revoke, create a new token and distribute the new secret.
Filtering and Searching
Use the filter pills above the token list to narrow the view:
- All — show every token
- Active — show only valid, enabled tokens
- Disabled — show only manually disabled tokens
- Expired — show only tokens past their expiry date
Use the search bar to filter by label or VM name.
Using a Scoped Token
Once you have a token's secret, pass it as the X-Auth-Token header in any HTTP API request, or use it with the vpvm CLI:
# Use a scoped token for remote CLI access
vpvm list --server 192.168.1.10 --port 49152 --token <secret>

# Or set it as an environment variable
export VPVM_TOKEN=<secret>
vpvm list --server 192.168.1.10 --port 49152
Scoped tokens are subject to their VM and scope restrictions — commands targeting VMs outside the token's scope, or operations beyond its access level, will be rejected with an error.
CLI Equivalent
All token management actions are also available from the terminal via vpvm token:
# List all tokens
vpvm token list

# Create a new Operator token for two specific VMs, expiring on a specific date
vpvm token create --label "CI Pipeline" --vms "ubuntu-dev,ubuntu-test" --scope operator --expires 2026-12-31

# Create an Admin token for all VMs with no expiry
vpvm token create --label "Admin Tool" --scope admin

# Rotate a token's secret (old secret immediately invalidated)
vpvm token rotate <tokenId>

# Disable a token (Token ID from vpvm token list)
vpvm token disable <tokenId>

# Re-enable a disabled token
vpvm token enable <tokenId>

# Permanently revoke a token
vpvm token revoke <tokenId>
See the Command Line Reference for full details.